Tonight we used Structo-Lite for the first time. We'd never heard of it before, but John and Roger told us about it. Roger used it for large areas on the living room and entryway walls. So we did the same thing in the attic to repair larger areas like the side walls where the interior wall was removed, the gables that are damaged from creosote, and big cracks around the windows.
Here's an example of a typical window repair. I start out by enlarging and deepening the crack with a pointy tool, then brushing out all the loose dust. If you click on the picture, you will see the detail of the raggedy front edge.

Next Keith fills in the crack with structo-lite.

Then he uses an inside edge tool to shape the corners at the window and the curved plane along the sill, and an outside edge tool to neaten up the top edge.

After just one coat, it looks like this.

Tomorrow we'll determine whether this is the finish coat or if it needs a skim coat of plaster. Then all we need is some paint, and you'll never know how bad these walls looked when we started.
By the way, my main job tonight was holding the light and giving moral support. This is all Keith.
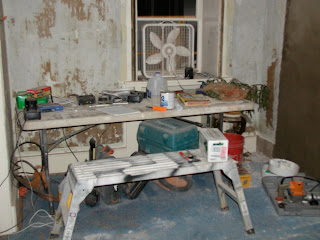
Now here are those pictures of my living room/builder's workshop I promised.


You might think it would be upsetting to see your house in this condition, but I find it strangely comforting. Seeing their professional tools all around the place reassures me that someone else is in control of all the chaos. Each day I love walking in here and taking it all in. And I want pictures of it so later when it's all cleaned up and beautiful, I can remember the path that got us there.


No comments:
Post a Comment