On January 28, Keith made a chase in the basement wall to bring in the geothermal pipes, a new domestic water pipe, and electrical wires for the new water pump and the flow center, which will be located out in the milk house.
I started tearing down the wall between the north and south basement rooms for the duct work. Notice the header in the doorway, which was fashioned from half of a log.
On the 29th I enlarged an existing chase over the header between the east and west ends of the basement for wires and water pipes and continued working on the wall.
Keith moved electrical outlets and pipes away from the planned path of the ducts. Up in the laundry room we made a hole for the dryer vent using the remnants of a terracotta ring in the old chimney.
Over the weekend Aaron helped take down the chimney on the south end of the roof.
He also helped us move the oil tank in the basement to give us access to the wall behind it where we needed to make a huge hole in the wall for chases between the old structure and the addition. Since it had 250 gallons of oil, it was very heavy and potentially unstable, so it was quite a production to do move it without incident. First we removed the feed and breather pipes that went through the wall to the outside, then we disconnected the flexible tube to the furnace. With two floor jacks and boards underneath, we just barely raised it off the floor and eased it out of the way. Then we made a temporary breather pipe and reconnected the feed to the furnace.
The rest of the weekend was spent knocking a hole through the stone up to the concrete block foundation of the addition.
We also piled up all the stone from the various holes in one place and cleaned up what seemed like tons of rubble.
Garrett continued the operation by cutting out the concrete block and fabricating a form for a poured concrete lintel.
Next Ben placed rebar across the top of the hole and poured the lintel using a mixture of concrete and stone, then finished it off beautifully with some of the stone from the wall.
Now we have our duct chase for the HVAC, a water pipe chase up above the insulation in the floor joists, and three other chases for wires and other stuff that may have to pass between all this stone mass.
Wednesday, February 3, 2010
Wednesday, January 27, 2010
Welcome Home!
Are you sitting down?
Are you ready for something amazing?
Remember this?
Well, after some time away it came home today. Here it comes:
Ta Daaaa!
We just can't get over how beautiful it is.
In other news, Dan and Garrett poured the footings for the porches today. There are three for the main entry and four for the back porch. Each sonotube is 12 inches in diameter and 40 inches deep, and holds about 5 bags of concrete mix.
I met with John S. at the farm so he could take measurements of the kitchen. Sally and I went over the electrical system in the old house so she could prepare a bid for us. She's simply wonderful and I look forward to having her do our electrical work.
Then I collected some (extremely heavy!) concrete blocks from the yard to use in the hay shed. I spent the afternoon sanding the attic, and then Keith and I finally ripped the plywood into one-inch strips to use for spacers on the rafters. Later we'll attach the bead board ceiling to the spacers.
Tuesday, January 26, 2010
More Attic and Basement Work
Yesterday the only work I got done was sanding plaster in the attic.
Then I met with Drew and four other people from his company about the geothermal system. Ben, the stone mason, will make a hole in the basement wall for the new water line and then close the window opening. He's also building the chase for the ducts through the 2-foot stone wall and the new concrete block wall (more about this is on my other blog!). Harold, Drew's son-in-law, helps design the system. Rich and Rick are the duct installers. We went through the whole house with John to develop the ducting plan and a timeline for the work. They should be able to begin later this week.
Last night we met with John S. to talk about custom kitchen cabinets. He'll come to the farm on Wednesday to take measurements.
Today Keith took off from work and we got a lot done. I painted the Zinsser BIN on the attic gables and it looks fabulous! I would take a picture, but all you would see is white. There's no creosote anymore. After all the masonry, structo-lite, plastering, sanding and painting, we've finally gotten our payoff.
Meanwhile, down in the basement, Keith pulled out miles of wire and copper--about half the copper is out now. The rest is tied into the radiators, and must stay in until the new heating system is up and running. I cleaned up the mechanical room even though the stone mason's just going to trash it again. Tonight we cleared all the junk and stuff we want to keep out of the basement. We made runs to the metal pile with the hot water heater, pipe and wire, to the burn pile with old wood, to the barn with furniture, to the garage with old pottery jugs and crocks, and to the dumpster with the toilet and buckets of debris and other trash.
Jules and his helper were here today putting in vents so the roofers can come next week. The plumbing code says you need a separate vent for every fixture. I think that adds up to ten. I've been wondering why there are so many little pipes sticking out of the roofs of newer houses, and now I know!
Steve and Stevie were busting up old concrete from the side porch today. They filled the hand-dug well and there's still a lot more to dispose of, so they'll dig a pit to bury the rest. While they were here, we decided to pay them to break up the rest of the sidewalks, since we wanted to get rid of them eventually. But we had them leave the material in place, so tonight we cleared away all that debris with the skid loader.
Dan applied a layer of structo-lite on all the walls of the entryway and new stairway and it looks really good. He has the perfect touch with that stuff. It was fascinating just watching his technique. Garrett started putting the foamboard insulation in the ceiling of the library. He has no idea how easy this job is compared to the attic ceiling where we had to make cuts around all those collar beams!
Sunday, January 24, 2010
Weekend Work
Today we had an awesome fire. Aaron and Arden came to help and we took turns tending the flames. We burned about 25 shutters, about a dozen drawers, some old fencing, deck stairs, and a pile of wood trash that we had collected in the hay shed.
Keith spent most of the weekend plastering large swaths of the attic walls while I sanded and filled in holes and cracks. The attic looks just amazing. I'm not going to post any more pictures of it, because I think we all get what new plaster looks by now! I don't know what John thinks about it--I guess it's not as perfect as if a professional had done it--but we're so glad we decided to do the masonry and plaster. It's taking us a really long time, but it's one of those jobs that's totally satisfying to do ourselves.
Yesterday afternoon I started working on the second floor landing. The last time someone remodeled they glued linoleum directly onto the floorboards instead of laying down a new subfloor first. So when the guys pulled up the linoleum, the paper backing and glue were left behind.
I'm soaking the paper and scraping it off--what a messy job that is. But the glue is impervious to my efforts.
We tested a small patch with a belt sander to see if that would take the glue off, and it seems promising. Eventually we'll probably use a drum sander on all the old flooring, so that may enable us to save this floor. John's going to have to make that call.
We still didn't get to saw the scraps of plywood that John's saving for us to use as spacers on the rafters. This is the second weekend in a row that we dropped the ball on that job. We neglected to bring in a pile of wood that he left for us last week and the rain ruined it. He must be getting disgusted with us! We'll try to get to it this week, or at least get it moved out of their way so they're not tripping over it.
The other big project we did get done this weekend was clearing out the rest of the plumbing fixtures in the basement so the HVAC people can install the heating and hot water systems. We disconnected and removed the toilet, sink, hot water heater, a radiator, lots of copper tubing and a set of shelves.
The dust, soil, stones and fallen mortar I swept up from just this one small room filled--and this is not hyperbole--three 5-gallon buckets to their rims. We had to leave the pipe and fixtures in the basement
because when John screwed 2X4s across the door for security, he used a kind of screw for which we don't have the proper bit, so we'll remove all that stuff another time.
Speaking of HVAC, we met with Drew from Natural Energy Solutions yesterday, and we like his proposal for a geothermal system better than anything else we've considered. Unfortunately, there isn't a simple, affordable approach to heating and cooling both the old stone building and the new frame addition with a single system, and geothermal heat pumps are outlandishly expensive these days. But we are strong proponents of geothermal energy, and this proposal meets all of our expectations. It includes the attic space, has two zones with separate thermostats, has no exposed ductwork in the addition, has minimal intrusion of ducts in the old house, uses our preferred approach to heating domestic hot water, and the heat pump is a Water Furnace, the most technologically advanced brand. Also, Drew's was the only plan to use a bed of horizontal pipes in the field rather than vertical wells. This arrangement offers more efficient energy transfer between the pipes and the earth, and as a bonus it is cheaper than drilling wells. In addition, Natural Energy Solutions offers a 10-year warrantee on all of the components.
Another big plus is that Drew's men can do every aspect of the job without imposing on John for anything, including the masonry for the duct chase from the old basement to the addition, as well as framing and drywalling the duct chases in the old house. And finally, the ducts can be roughed in this week, so John will be able to move ahead with electrical and plumbing in the addition ASAP. The system can be fully operational within two weeks, and then all the drama over HVAC will be over.
Friday, January 22, 2010
Friday Fun
Here's one more sequence of wall repair pictures. A month ago the gables of the attic looked like this:
First we took out the ceramic rings and mortared stone and brick to close up the holes into the chimneys. Next we scraped off all the loose plaster, and filled in the large gaps with mortar.
Then we built up the wall surface with structo-lite.
Finally, last night we plastered the entire section of wall. And by "we" I mean Keith.
Today I spent the afternoon sanding the plaster, which is the worst job of the whole project. The dust is like talcum powder and it migrates everywhere. Ughhh.
On the other hand, two fun surprises revealed themselves overhead this week. The bedroom has a tray ceiling:
And there's a lovely arch between the living room and kitchen. Dan and Garrett did a magnificent job framing this.
Charlie has embedded all kinds of nice little touches in his design which aren't evident to me in the 2-D drawings but come alive in 3-D space. I take great pleasure watching them unfold through Dan's and Garrett's skilled hands.
Thursday, January 21, 2010
Plaster
Tonight we plastered the big repairs in the attic and the bathroom. Remember last Wednesday I pulled out all the loose plaster around the bathroom window:
Then we built up from the lath with structo-lite, and tonight we applied the first coat of plaster:
Recall how this wall behind the pipe looked on Monday after I etched out the cracks:
Here it is tonight after applying structo-lite:
Remember after the guys took down the plaster and lath from the interior attic wall, we removed the studs and those weird metal straps. Then Keith mortared the exposed stone and built the wall up in layers. Last night he topped it off with structo-lite:
and tonight he skim coated plaster on the surface:
The random-width knotty pine flooring is acclimating to the house before installation.
Steve and Stevie were here today backfilling and grading.
Here's the backyard ready for the footers for the back porch:
And this is the front entrance ready for the footers for the front porch:
Next they will finish the demolition/excavation of the south side where the old porch was. We'll use the rubble to fill in the hand dug well when the porch floor is removed.
Wednesday, January 20, 2010
Structo-Lite
I'm finished etching all the cracks in the attic wall. Last night we started filling them in with the first coat of DuraBond 90. It takes two applications of plaster to completely fill them in. The first coat leaves a slight impression and tomorrow the second one will bring it level to the surface.
Tonight we used Structo-Lite for the first time. We'd never heard of it before, but John and Roger told us about it. Roger used it for large areas on the living room and entryway walls. So we did the same thing in the attic to repair larger areas like the side walls where the interior wall was removed, the gables that are damaged from creosote, and big cracks around the windows.
Here's an example of a typical window repair. I start out by enlarging and deepening the crack with a pointy tool, then brushing out all the loose dust. If you click on the picture, you will see the detail of the raggedy front edge.
Next Keith fills in the crack with structo-lite.
Then he uses an inside edge tool to shape the corners at the window and the curved plane along the sill, and an outside edge tool to neaten up the top edge.
After just one coat, it looks like this.
Tomorrow we'll determine whether this is the finish coat or if it needs a skim coat of plaster. Then all we need is some paint, and you'll never know how bad these walls looked when we started.
By the way, my main job tonight was holding the light and giving moral support. This is all Keith.
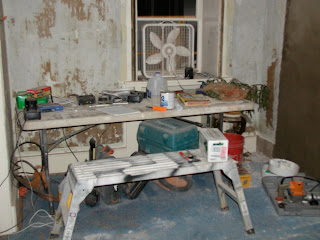
Now here are those pictures of my living room/builder's workshop I promised.
You might think it would be upsetting to see your house in this condition, but I find it strangely comforting. Seeing their professional tools all around the place reassures me that someone else is in control of all the chaos. Each day I love walking in here and taking it all in. And I want pictures of it so later when it's all cleaned up and beautiful, I can remember the path that got us there.
Tonight we used Structo-Lite for the first time. We'd never heard of it before, but John and Roger told us about it. Roger used it for large areas on the living room and entryway walls. So we did the same thing in the attic to repair larger areas like the side walls where the interior wall was removed, the gables that are damaged from creosote, and big cracks around the windows.
Here's an example of a typical window repair. I start out by enlarging and deepening the crack with a pointy tool, then brushing out all the loose dust. If you click on the picture, you will see the detail of the raggedy front edge.
Next Keith fills in the crack with structo-lite.
Then he uses an inside edge tool to shape the corners at the window and the curved plane along the sill, and an outside edge tool to neaten up the top edge.
After just one coat, it looks like this.
Tomorrow we'll determine whether this is the finish coat or if it needs a skim coat of plaster. Then all we need is some paint, and you'll never know how bad these walls looked when we started.
By the way, my main job tonight was holding the light and giving moral support. This is all Keith.
Now here are those pictures of my living room/builder's workshop I promised.
You might think it would be upsetting to see your house in this condition, but I find it strangely comforting. Seeing their professional tools all around the place reassures me that someone else is in control of all the chaos. Each day I love walking in here and taking it all in. And I want pictures of it so later when it's all cleaned up and beautiful, I can remember the path that got us there.
Monday, January 18, 2010
Holding pattern
Sunday, January 17, 2010
Weekend work
Yesterday we had some stuff to do in the morning, so we didn't get to work until after 2:00. I spent the afternoon etching V's in the cracks in the plaster of the attic walls, and then cleaning up all the dust I created. Keith took down the flimsy railings in the attic and did some mortaring in the living room, bathroom and attic.
Aaron and Arden brought an extra power drill for us to use when we put the spacers on the rafters. They saw in the blog that one of our drills is battery-powered, and they were concerned that we would run down the battery, bringing the work to a stand-still. As it turns out, we didn't get to that phase of the work this weekend. It was a nice gesture on their part, and we will use it eventually--maybe next weekend?
This morning we reviewed the kitchen design with Ken at Home Depot, and we're close to finalizing it. We'll be able to use both the range and refrigerator that we just bought a couple years ago, and my agate-topped baking cupboard as well. That makes me happy. I hated the thought of replacing appliances that are so new, and I really wanted to continue using the antique cabinet that we got from Lisa 35 years ago.
After that, we went to the farm and spent the day doing exactly the same things as yesterday: etching cracks and mortaring. Keith's getting quite skilled in his career as a mason. He's working on the large section of fallen plaster over the bathroom window and he did an excellent job on the baseboard area in that same room. We were going to leave both those areas for Roger, but Keith was feeling confident so he went ahead and did them himself.
Arden said she's going to pass a petition around to send Charlie, pleading for an open stairwell. I swear I didn't put her up to it! She just assumed there would not be a wall on the lower part of the stairs, and when I told her there is, she couldn't believe it. I told her the decision is out of my hands, and that's when she said we should poll the whole family and overrule the architect. Hmmmmmmm . . .
Actually, I think we're beyond the point of no return on that design element, as John has fashioned the central beam around the concept of a wall, not open railing. This is one of only a couple details where I've conceded my preference to Charlie's and John's professional opinion. All-in-all, on a project of this scope that's probably not too bad--and I did hire them for their expertise. So far I've found that when our ideas diverge, their insight has provided superior results, and I'm learning to trust their recommendations. If they stand their ground over a detail that's in dispute, I figure they have good reason, even if I don't completely understand or agree. Still, sometimes it is hard to give in.
Friday, January 15, 2010
Old House Love
The themes for this week are love and gratitude.
We are growing more and more emotionally attached to this house, and are so pleased with everything that's being done here. And we are more grateful than words can express to everyone who's helping us build this lovely home. Not only for their skill and labor, but also their patient and generous guidance as we fumble along trying to do some of the work ourselves. I'm sure that's not usually part of the deal in a builder's contract, but we totally appreciate their tolerance of our presence in their work zone. A million thank you's, guys!
We love the things we're able to preserve: deep windowsills, curved walls at the windows, old slab doors and latches, random-width flooring, plaster walls, circular stairs and exposed log ceiling beams. And the updated technology that will make it even better: windows, HVAC, wiring, plumbing and insulation.
We LOVE the changes Charlie imagined for us and that John, Dan, Garrett and Roger are bringing to life: four roomy new closets, upstairs laundry, removing the living room wall to create a spacious and well-lighted office/gym/craft room, library with vaulted ceiling and skylights, wide central stairway with a powder room tucked underneath, and attic hideaway where the kids can retreat on visits home.
Just as John promised, the wisdom and beauty of Charlie's design continues to be revealed to us as time goes on.
Thursday, January 14, 2010
Exterior Trim
John had all hands on deck today applying felt to the south wall and fastening the painted soffit and fascia. They had two very fancy miter saws set up in the bedroom and the table saw in the driveway. Dan measured while Garrett manned the saws, then Johnny helped Dan nail the pieces in place. When this job is done the roofers can come in.
I spent the afternoon taking the rest of the staples out of the linoleum in the entryway. Now, I realize John was probably laughing at me for doing this, because his guys could have just hammered the staples down into the linoleum in about 10 minutes, but he was gracious enough to not let me see him laugh, although I'm pretty sure I heard some snorting in the background while I was working. However, he did lend me a tool that made the task much easier than the wire cutter I was using. It's my favorite new tool of the moment:
http://hand-tools.hardwarestore.com/67-410-nippers.aspx
Speaking of new things, here's my favorite product of the month:
http://www.uline.com/BL_7004/Sweeping-Compounds
Sweeping compound sure keeps down the dust in the attic every time I go through with a broom. Who knew? And by the way, how many more times will I have to clean up the dirt in the attic till there is no more? Right now it appears to be endless!
I asked John if I could borrow his nail gun this weekend to put the spacers on the rafters, and of course he said yes. He has the most generous spirit of anyone I know. But he said that if he were doing it, he would screw the strips on with 1 1/4" coarse-threaded drywall screws. We have two screw guns, one electric and one battery-powered, so we can use ours to get that job done. But he said we should use his table saw to rip the plywood scraps into strips, and we will, with thanks!
Subscribe to:
Posts (Atom)